- Cuirass (Do) and (Kusazuri)
- Shoulder Plates (Sode)
- Thigh Armour (Haidate)
- Upper-Arm Armour (Kote / Gote) and Fighting Gloves (Tekko)
- Shin Protection (Sunate) und Knee Protection (Tateage)
- Classical Samurai Face Mask (Men Yoroi / Mempo/ Menpo including Throat Protection
- Samurai Helmet (Kabuto) und Neck-Protection (Shikoro)
The Cuirass (Do) is the largest part of the armour. It protects the major part of the torso. I made it in lamellar style – a classical version of early medieval japan. The advantage of this style is it´s flexibility. I will fit even if you gain or loose some weight. The plates overlap four times, so it is pretty save and still flexible.
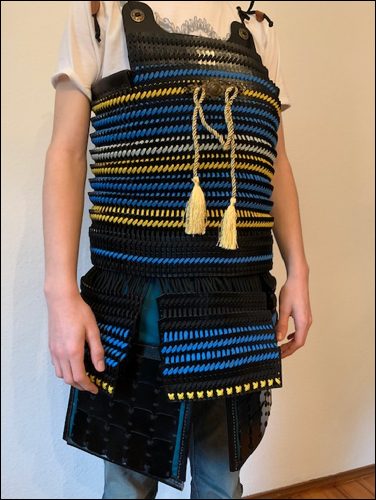
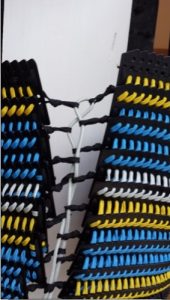
The Cuirass is laced in the back. Indeed, there is a gap directly over your spine. This may be covered with a so called „Coward Shield“. But this was not often used, so I left it out.
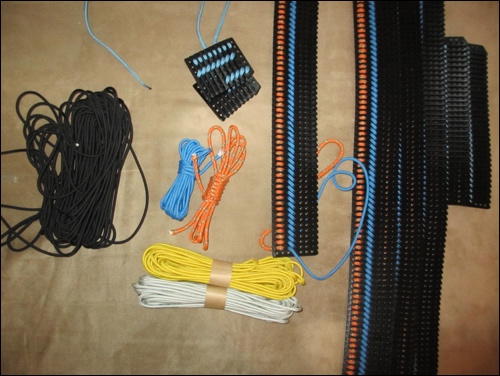
In order to build a cuirass (do) which is very close to historical models of ancient Japanese samurais, this is what you need
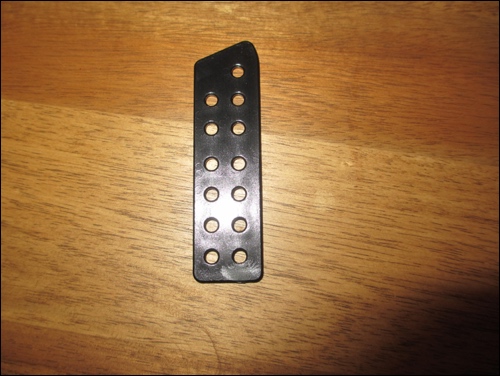
- Lamellar plates
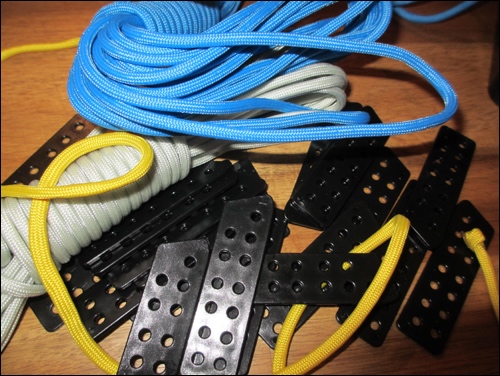
- A lot of paracord
- Kydex plates
- Coping saw
- Emery paper and grinder
- Drill
- Leather
- Leather paint
- Needle, thread.
- Toggle buttons
- Oven
- Ornamentals
- …and more
About Lamellar Style Japanese Samurai Armour
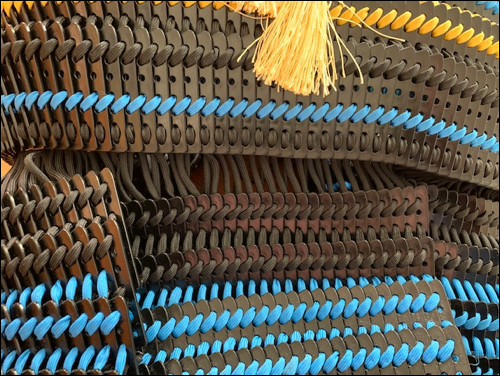
Building an early medieval Japanese samurai armour in lamellar style requires a lot of lamellar plates! I though about using aluminum or steel plates but decided against it, simply because it required too much equipment to work with metal.
For the do (cuirass) I purchased Effingham Plates from „Plastic Lamellar“. This type of plates is also recommended by the author of this website: http://www.sengokudaimyo.com. This is an inspiring website which you might want to read in advance. It helped me a lot.
If you purchase the plates and if you are not located in the US, keep in mind that you will have to pay import tax. I payed as much on tax and fees as for the plates themselves. A big surprise and a real pain. Purchased 2000 plates and used about 1700 in the end.
Traditionally, the plates are laced with silk laces. Too expensive. I saw people using Shoe laces of cotton fabric. I think that is an excellent choice since they are flat by design. I went for paracord. However, you will need a lot of laces.
Think about how you want the cuirass to look like, in the end. Make a good choice for the right colour in advance.
The laces (paracord or shoe laces) need to be as thick as possible so that it can just be squeezed through the holes in the plates. The cuirass may not show any signs of holes, in the end. Don’t choose too small laces.
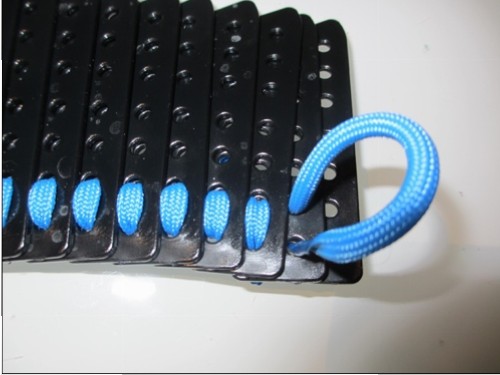
For paracord, you have to pull out the inside strings of the cord. You only want to use the mere mantle.
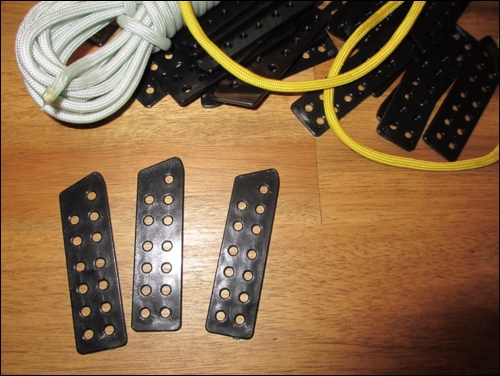
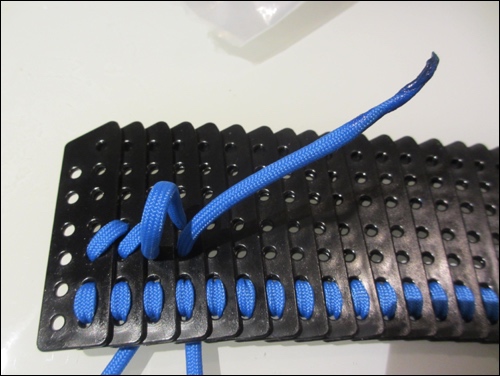
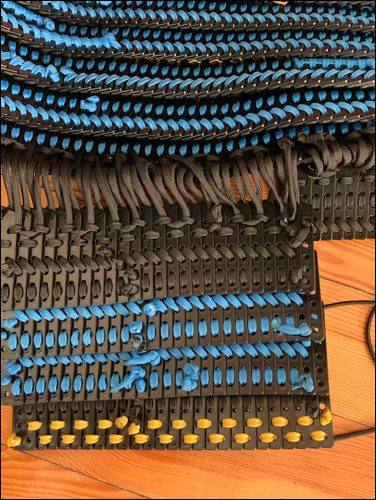
First, you lace the plates in rows. you use the four lower holes of the plates and simply lace them together by going back and forth like this:
After that, you go for the two rows of holes, above. Now, you want to lace the plates diagonally.
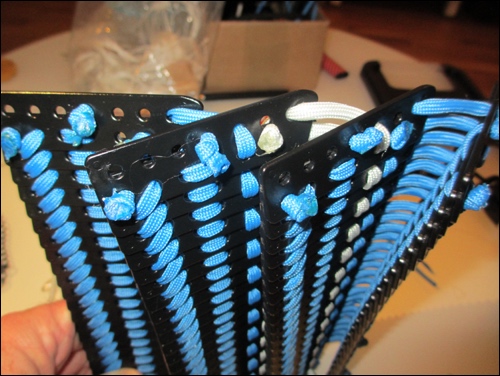
Now you see, that the plates overlap by 50%. If you have build at least two separate rows of plates, you will then lace the separate rows together. How? It is technically spoken, quite easy but difficult to explain in writing or pictures so I´d like to refer to this youtube video where it is nicely explained: youtube video online
Just to repeat: Plates are laced to rows. rows are laced to solid shields. The rows will also overlap by 50% so in the end, your body is protected by a layer of 4 plates. The was this lacing works makes the shield very flexible.
In order to determine the length of the rows you have to build, simply take measure. Your body scope determines the lengths of the rows.
The cuirass should reach just over your navel. Don´t make it too short.
Add shorter two rows at the top center of the shield. This is your breast protection. At the top of these two shorter breast rows, I fixed a solid plate of kydex, which just reaches the clavicle.
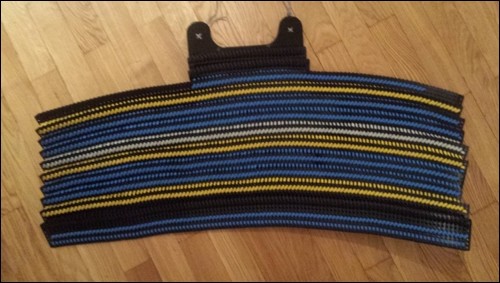
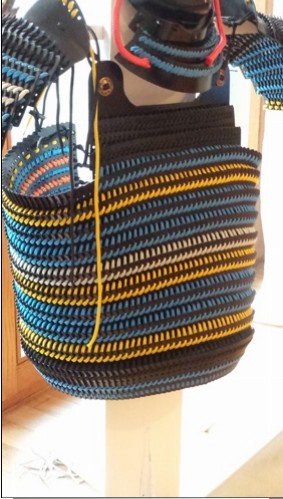
See below, you the cuirass (Do) is laced together in the back. You can pull it as close as you like and it will perfectly fit your shape.
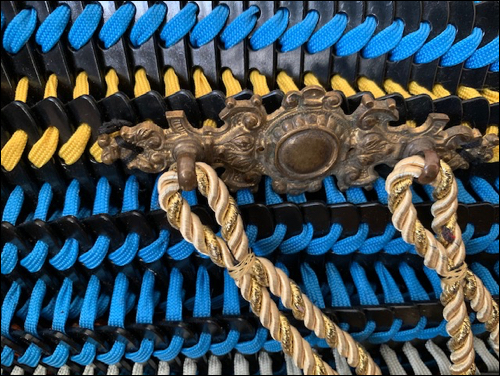
Das Brustschild erhält eine Bohrung durch welche ich -mit etwas Zierrat- ein Paracord ziehe.
I drilled two holes into the breast plate and fixed laces there, using some Ornaments which I found on a flee market. These laces are used for fixing the cuirass to the shoulder pad from front. You will fix laces in the back of the cuirass as well and also fix then to the shoulder pad. These laces work like suspenders. The entire weight is on the shoulders.
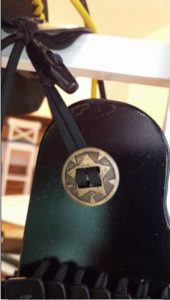
The cuirass (do) hanging to the shoulder pad – suspenders style.
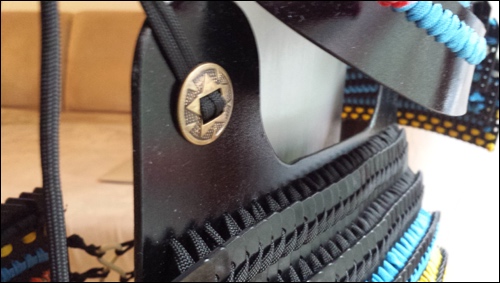
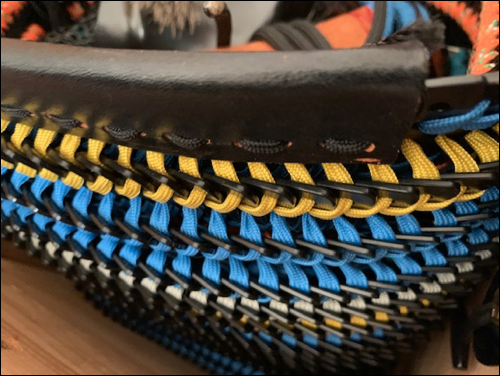
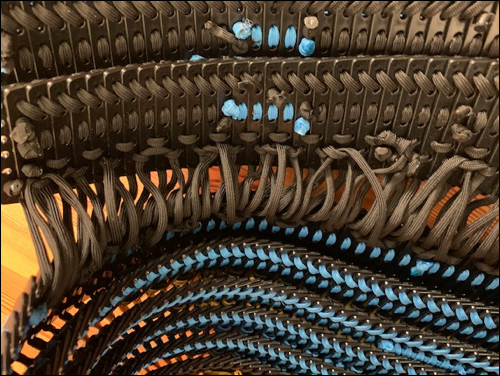
In order to improve stability and design of the basic form of the cuirass, I added leather boards to the top of the upmost row of plates. Therefore I cut respective leather stripes, watered them in order to make them flexible, bended them over the edge, let the drive, put holes in, painted the leather black and then sewed it to the cuirass.
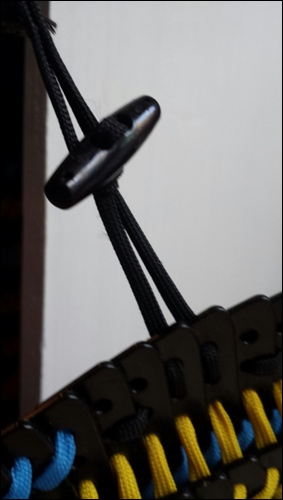
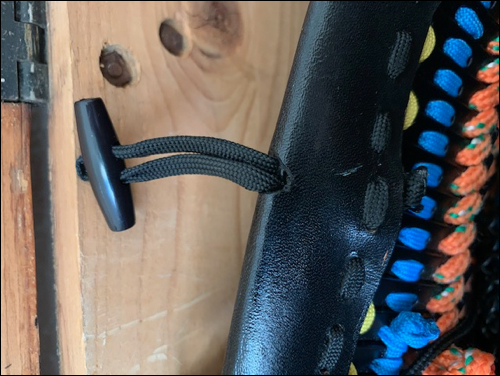
You carry the cuirass suspender-style. Therefore, I fixed toggle buttons to the cuirass.
I added some ornaments which I also found on a flee market.
Kusazuri – additional protection
The cuirass (do) protects your torso. It usually goes just below the nave. Your thighs will be protected with an armoured apron. However, there would be a gap that is unprotected. The socalled Kusazari – an add on to the cuirass – covers this gap.
In order to build a kusazuri, it is about lacing plates to rows and rows to shields again. I decided to add three kusazuri shields to the cuirass. One in front and two for the sides. Some historical models show a forth one at the back. I decided against it, since I also did not build a coward shield for the cuirass. I will simply not turn my back to the contester.
As soon as you have laced your Kusazuri shields, you simply lace them to the cuirass. Just figure out yourself, how long the laces must be in order to protect your body well.
The more laces connect the kusazuri to the do, the better it will look like, in the end. Don´t use to few, otherwise it will look funny. More is better.
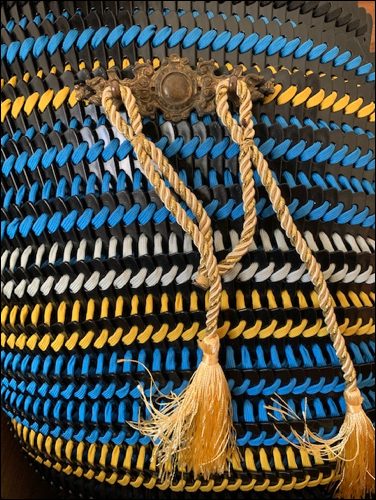
This is how it will look like, in the end:
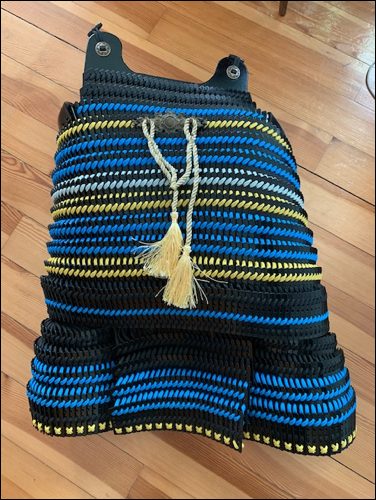
See how the plates move into each other if you place the cuirass to the ground. Same happens if you wear it and move. The cuirass is flexible, allows you even to sit and let you move in it real well.
